Update patrons
The Update Patrons option lets you make the same changes to a group of patron records. Depending on your access level and permissions, you may not have all the sub-tabs or fields available.
Select Admin > Update Patrons. You can update patrons on the following sub-tabs:
Update sub-tab
The Update sub-tab uses a search-and-replace feature to update one or more fields in patron records that have a field value in common. Use the Change drop-downs to change up to three fields of information at once in the patron record.
| Example: Use this to manage individual patrons throughout the school year, such as when a student leaves your school and you can change their status to Inactive. Or, you might want to change a student’s homeroom. |
To update patron records:
- Select Admin > Update Patrons > Update sub-tab.
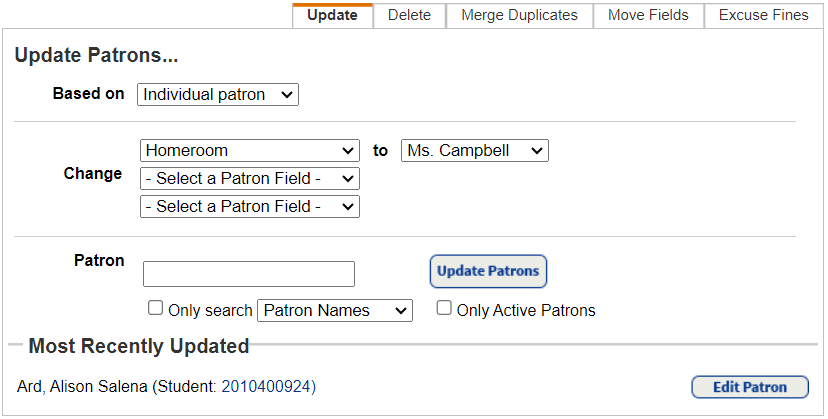
- From the Based on drop-down, select Individual patron or use one of the following on which you want to base the update:
SelectThen…Barcode list or file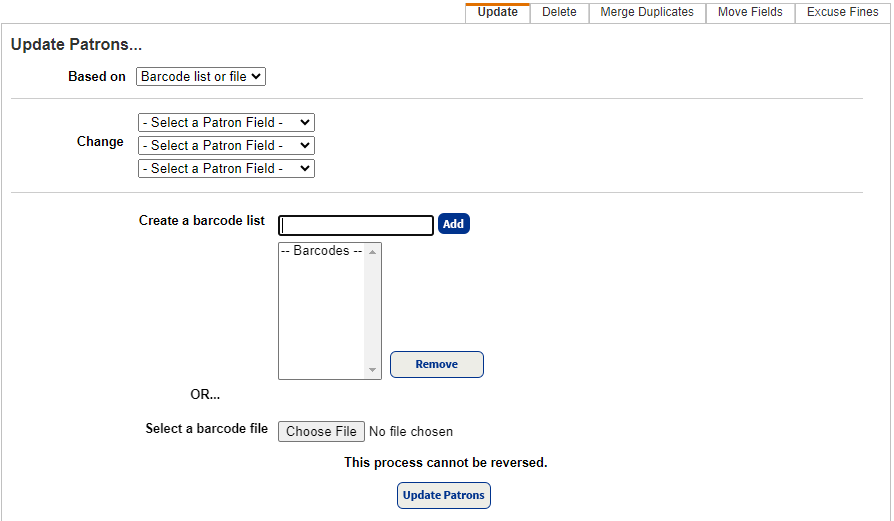
- To create a list, use the Create a barcode list field to scan or type the barcodes.Note: To remove a barcode number from the list, select it and click Remove.
- To select an existing file, click Choose File (or Browse).
- From the Whose drop-down, select the patron field on which you are basing the update.
- In the is field, select or enter the contents of the field that you want Destiny to find.
- In the Change drop-down, select the field to update.
- In the to field, select or enter the new data for the field.
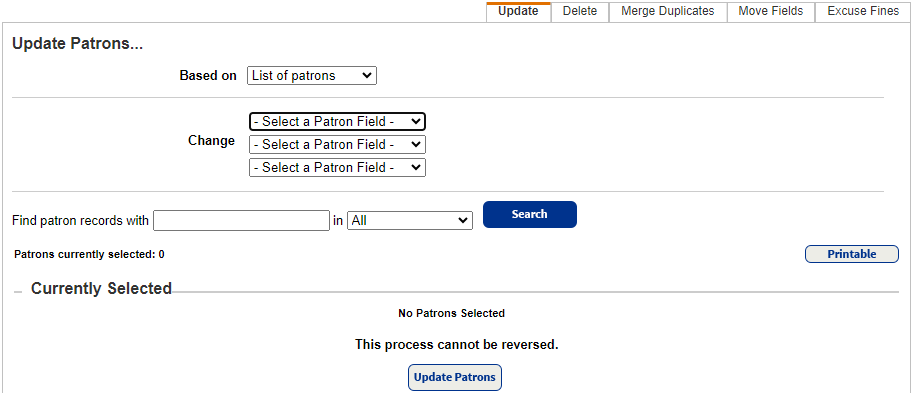
- In the Find patron records with field, enter a value.Note: If you do not have the whole name or word, enter part of it, followed by *, or use a question mark (?) to replace a single letter.
- In the drop-down next to in, select the field to search.
- Click Search.
- In the list that appears, find the correct patron and click Select. The patron moves to the Currently Selected section at the bottom of the page.
- Repeat these steps for each patron.
- From the first Change drop-down, select a field to update, and then do the following:Note: Three Change drop-downs are available if you selected Individual patron, Barcode list or file, or List of patrons from the Based on drop-down.
- Enter or select the new contents in the to field.
- To clear a field, leave the to field empty.
- To update a second or third field, repeat.
- If you are updating only one field, from the second drop-down, leave -Select a Patron Field-.
- If you selected Individual patron from the Based on drop-down, in the Patron section, do the following:
- Make sure your cursor is in the Patron field, and then scan or enter a patron’s barcode number.Note: To verify the changes, click the barcode number or Edit Patron next to the updated patron.
- To speed the search, select the Only search checkbox, and select a field (such as Patron Names) from the drop-down.
- To complete the task for active patrons, select the Only Active Patrons checkbox.
- Click Update Patrons. Destiny processes the record, and the patron’s name, patron type, and barcode number appear in the Most Recently Updated section.
- Continue scanning any additional barcodes to update the information as needed.Note: If you cannot scan a barcode, or the wrong record appears, you can search the database by entering a patron name (or part of a name, followed by *), Grade Level, Homeroom, User Name, User Defined field, or District ID, and clicking Update Patrons. Then, select the correct patron in the resulting list.