Add, edit, and delete Resource Lists
Resource Lists let you select titles in your collection for various purposes, such as to print labels, run reports, and perform catalog maintenance. A Resource List contains the title record and all copies associated with it.
The ability to share Resource Lists varies by user type:
- Site-level users can build a list of resources for personal use or to share within their district or school.
- District-level users can build a list of resources for personal use. This cannot be shared within the district.
Add a Resource List (for site-level users)
- Select Catalog > Resource Lists > My Lists tab.
- Click Add List. The Add a List page appears.
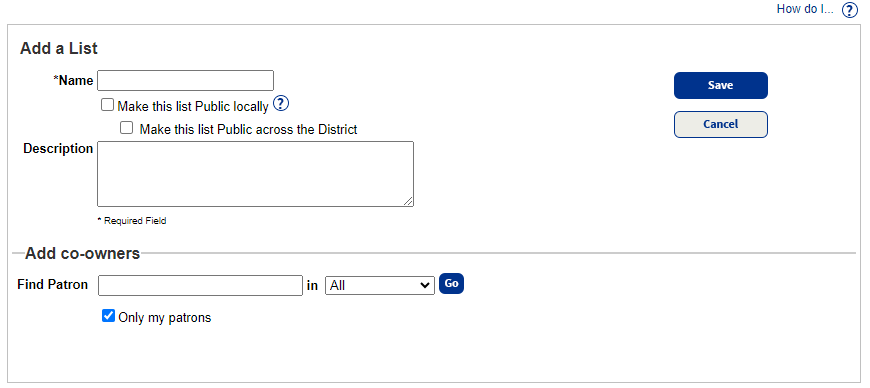
- In the Name field, give the List a recognizable name.
- To make the List available to users in your school, select Make this list Public locally.Note: No one else can see your List unless you make it public from a site.
- To make the list available to users in your district, select Make this list Public across the District.Note: To make the list public across the district, you must select both the Make this list Public locally and Make this list Public across the District checkboxes.
- In the Description field, type information about the contents of your List (optional).
- If you want to add a co-owner:
- Enter a search term in the Find Patron field.
- Choose a patron record field.
- To search patrons at other schools in your district, deselect the Only my patrons checkbox.
- Click Go.
- Next to the patron, click Add. The patron moves to the Select Users section.
- Click Save. The Resource Lists page appears.
| Notes:Lists you create appear in Resource Lists > My Lists tab. If a List is public, a checkmark appears in the Local Public and/or District Public columns.You can also add a List from within an open Resource List. Click Add List at the top of the page from any tab.To add titles or resources to the List, see:Add titles to a Resource List (Library Manager and Media Manager)Add resources to a Resource List (Resource Manager) |
Add a Resource List (for district-level users)
- From District Back Office, select Catalog > Resource Lists.
- Click Add List. The Add a List page appears.
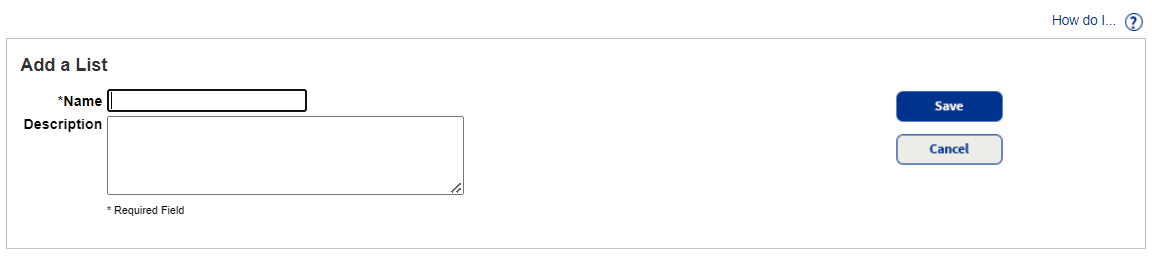
- In the Name field, give the List a recognizable name.
- In the Description field, type information about the contents of your List (optional).
- Click Save. The Resource Lists page appears.
Edit a Resource List
- Select Catalog > Resource Lists.
- If you are logged in as a site-level user, click the My Lists tab.
- Find the Resource List you want to edit, and then click
 .
. - Update the appropriate fields as needed.
- Click Save. The Resource Lists page appears.
Delete a Resource List
- Select Catalog > Resource Lists.
- If you are logged in as a site-level user, click the My Lists tab.
- Next to the List you want to delete, click
 .
. - From the pop-up that appears, click Yes to proceed.