Add, edit, or delete a site
When a site in your district becomes licensed to use Destiny or adds a product, you can add or edit the site’s information.
Add a site
- Log in as a Destiny Administrator.
- Select Setup > Sites sub-tab.
- To add a new site, click
 . The Add Site page appears.
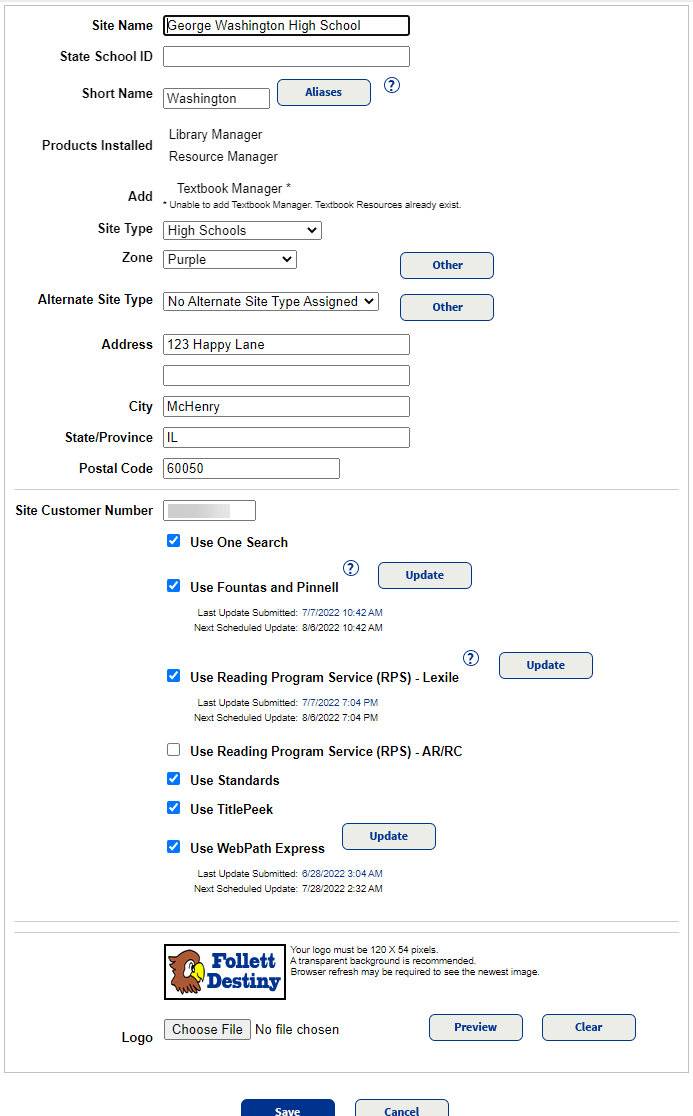
 - Add the Site Name.
- Enter a State School ID, if your state provides one.
- Enter a Short Name and an Alias.
- Select the Destiny Products the site has licensed.Note: The Textbook Management section is for Textbook Manager only. Also, if the district has one or more Resource Manager sites with textbook resources, the Destiny Administrator cannot add Textbook Manager to a new or existing site.
- Select the Site Type.
- Select the Zone. To create a new zone, click Other to define and save a new one.
- If adding a Resource Manager site and you want to group the site for reporting, select from the Alternate Site Type drop-down. To create a new alternate site type, click Other.
- Enter the full site Address.
- Enter the Site Customer Number.
- If you have a site logo:
- Click Browse (or Choose File, depending on your browser) next to Logo.
- Browse to and select the image file.
- Click Save.
Edit a site
- Log in as a Destiny Administrator.
- Select Setup > Sites sub-tab.
- Find the site row that you want, and click
 .
. - Make any necessary changes.
- Click Save.
Delete a site
The delete process will delete all of a site’s patrons, holdings, and circulation statistics. Export any data you want from the site prior to deleting it.
- Log in as a Destiny Administrator.
- Select Setup > Sites sub-tab.
- Next to the site you want to delete, click
 .Notes:
- Sites cannot be deleted if they have an in-progress inventory, pending resource transfers or orders, or a patron is a custodian for off-site items.
- If Delete a Site is a task limited to run on specific days/times, you will have to delete the site outside of those hours.
- A message states what will be deleted. To continue, enter the district administrator (Destiny Administrator) password.
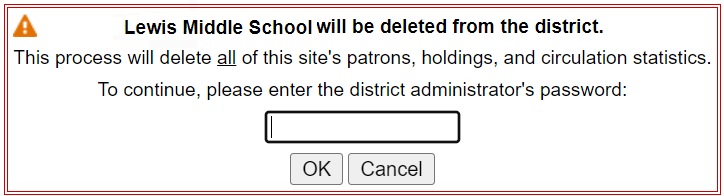
- Click OK.